My Prusa i4 story
As I needed the 3D printer for further robot development and fun, I've bought myself a one. Some time ago I had together with my friend some early Prusa i3 model, so I thought that those i4 enhancements looked good and I wanted to have as simple user experience as possible. How naive, don't you think? :D
Update kit is available here.
The first thing I was to find that Y-axis holder part was broken and that the shop can print me a copy. As I have found a temporal way to print this one I did it and gave my thanks to the shop. So now I could safely print? Nope.
After looking closer I have found that around my electrical outlet were some strange fissures. And that actually the side panel was broken in this place and hold together only by the socket itself. Of course the shop was saying that was a couriers fault and if I want to I can fight for some refund from them - that much of a year guarantee I had. So I've designed the corner reinforcement part, which wasn't ideal as it was difficult to define all of the sizes but it was workable. And I have found some weird problems with X-axis layer shifting and extruder getting stuck from time to time resulting in empty layers.
But first I had to add some light into the table darkness and LED tape did quite well.
I have found also some parts from other people, which solved some problems with upper-layer print quality or add some flavor.
Extruder problems were mostly solve by adding the stripped out and cut in half rubber from some old pen - the original metal head was designed in mind of always pulling whatever happens, so when it failed it got stuck without a possibility to pull a bit less of filament.
Z-axis was noisy, so I've based my solution on 2 spinners (with their gearing). As printers skeleton allowed it, I've designed a non screw-based solution to fix Z-axis. It haven't solved all of the noise however and sometimes the is some resonance from the right side.
Filament was a problem of quite a time, as it proffered to have its moods. I had several unused gears in stock, so I've tried to make a simple and solid solution which would fix the filament and make it rolling easily. And it worked much better than it was but still has its issues - sometimes, as legs are unfixed, a filament is drops out at one side. Rarely as it is one day it can break me a model in some way, so I will need to fix it.
There is also a disadvantage of a need to design inner parts for different kinds of filament rolls, but I've decided that they are not too many and that the model is easy to scale.
Still all the time there was a problem with the X-axis. I've found that bed was too inclined by its own weight, so I've added some small parts to support it, but the friction was too great. So finally as you've seen above I've bought 2 rails from some outdated hardware and designed parts to hold it. And it did not helped. As there was surely something else involved I've got inside of the rails linear gear to find a lot of rust inside - only when I've cleaned it up and bathed all of the balls in the oil it started to work. But I'm afraid that I will need to repeat the process from time to time, as the gearing looses its oil on the rail, and rail looses it naturally with time, from both dust and gravity. Support rail does it job however and it solved some problems, so I've left it.
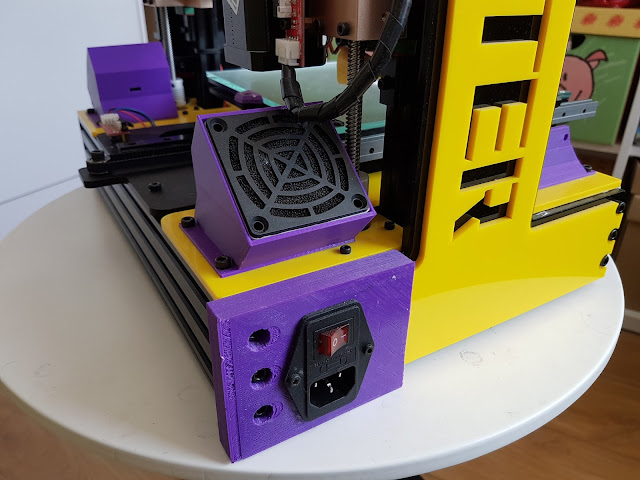
Finally, on one beautiful and warm day, I've found that printer prints with bed temperature 120C while it was supposed to hold it 70. I've turned it off, waited for it to cool down, started - and the temperature went up without any printing. After some research I came down to the conclusion that the relay used in the printer is semiconductor based, and if its broken it loses the current and lets it pass. I've seen that people where making some cooling solutions, so now I new why. So I bought a new and better relay (40A instead of 25A max current), two powerful fans and parts to hold this all together. Ideally fans should pump the air at back and it would flow out at the front, but with many openings below the bed it does not work that ideally. I haven't decided yet to close those openings at least partially down, but I'm surely considering it in the background.
With all of those fixes it looks to work more or less how I would of like it, with some cons in terms of noise (external powerful fans make a similar amount of noise to the built into power supply fan), need to remember about X-axis issues, hitting bed calibration difficulties caused by additional rail and 3 instead of 4 knobs. The new relay have greatly improved the bed heating time and I had a feeling that overall energy levels have improved for that matter - with steppers having more power than before. But this is subjective.


